


Getting Started with openFuyao Open-Source Community

 2025-04-20
Contents
- [Getting to Know openFuyao](#Getting to Know openFuyao)
- [Development Environment Preparation](#Development Environment Preparation)
- [Contribution Route](#Contribution Route)
- [Other Experience](#Other Experience)
- Conclusion
Getting to Know openFuyao
openFuyao is an open-source community oriented to software technology innovation of general-purpose computing and intelligent computing clusters. It is dedicated to providing the world with a diversified computing cluster software ecosystem and unleashing the infinite potential of intelligence. It aims to bring together partners and developers through open collaboration, build Internet-based scheduling capabilities of diversified computing power, and maximize the utilization of cluster computing power to foster key foundational software technologies based on clusters, develop unified and open technical standards, and jointly create an efficient and innovative computing cluster community.
Development Environment Preparation
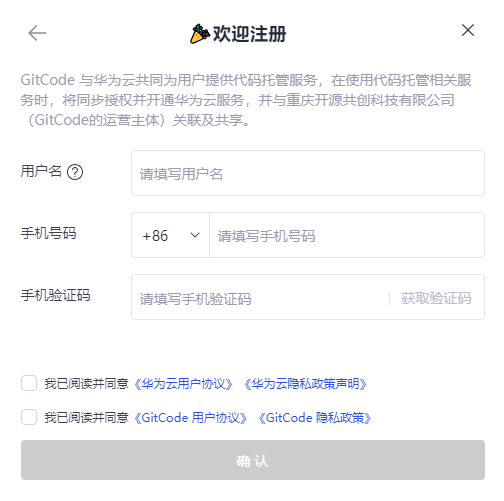
1. Preparing a GitCode Account
GitCode is a code hosting platform similar to GitHub. Creating an account and signing an individual Contributor License Agreement (CLA) are necessary for participating in an open-source project.
Register a GitCode account on the GitCode official website: https://gitcode.com/.
To sign the CLA, visit the openFuyao official website: https://cla.openfuyao.cn/sign/67e7c745ea9ceaa8feb65567.
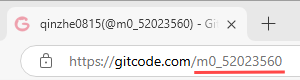
Note: The email address for signing the CLA must be the same as the email address associated with the GitCode account. The GitCode ID, also the GitCode account, is part of the Uniform Resource Locator (URL) of your personal homepage, as shown in the following figure.
To check the email address used, you can choose Settings > Email, as shown in the following figure.

2. Installing the Git Tool
Next, install Git, which is a version control system. This is critical to the contribution of an open-source project. Visit the Git official website Git - Downloads (git-scm.com) and install the Git tool as prompted (use the default settings).

3. Configuring a Git Account
Configure the Git username and email address to associate the identity with the GitCode account. In this way, whenever code is submitted, contributor information is correctly recorded.
#Set the username to your GitCode account.
git config --global user.name "your-user-name"
#Configure the email address to be the one corresponding to the account (the email address used to sign the CLA).
git config --global user.email "your-email-address-on-gitcode"
#Check the configuration result to ensure that the information is correct.
git config --list
Example:
git config --global user.name "m0_52023560"
git config --global user.emile "qinzhe8@h-partners.com"
git config --list
Contribution Route
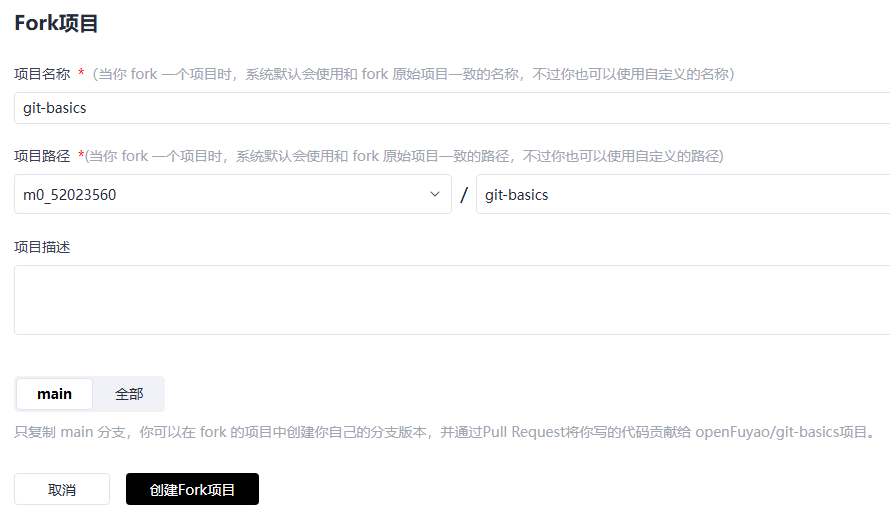
1. Forking an Upstream Repository
Select a repository you are interested in and would like to contribute to, and fork it to your GitCode account. In this way, you have the permission to make changes in the repository.

Click Fork in the upper-right corner of the repository to fork the repository to your account.
In this example, the repository is forked to an account named m0_52023560.
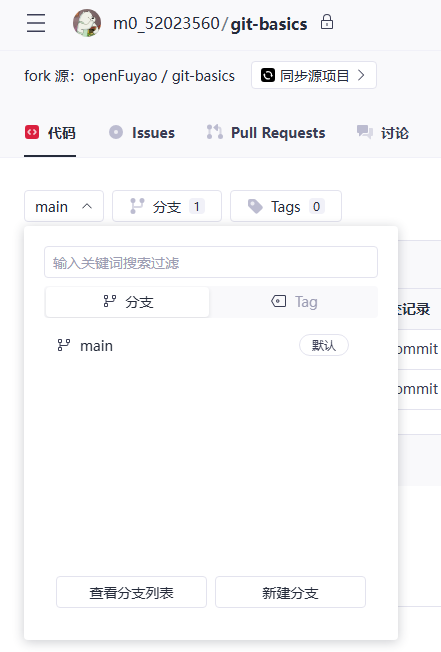
After the operation is complete, the repository is displayed on your homepage.
Note: If you have forked a code repository but want to delete it and fork it again, access the code repository, open the Project Settings page, and click Delete. Then, you are required to confirm the deletion. After the verification, the repository can be deleted.
After forking a repository on the GitCode page, run git commands in the CLI to perform the following steps.
2. Cloning the Repository to a Local Path
Use Git commands to clone the forked repository to a local path to start working.
#Clone the remote repository to a local path.
git clone <repository URL>
#Access the repository directory.
cd <local path of the repository>
#Check the status of the current branch and work zone.
git status
Note: On the repository page, click Clone to view the repository URL.

Example:
git clone https://gitcode.com/m0_52023560/git-basics.git
cd git-basics
git status
3. Creating a Branch
It is a good habit to create a new branch on the local host before making any changes. It helps isolate the development environment and prevents impact on the main branch.
#Create a new branch and switch to it. (You are advised to name the new branch with your GitCode ID.)
git switch -c <custom branch name>
#List all local branches and mark the current branch.
git branch
#Display the current branch status.
git status
Example:
git switch -c m0_52023560
git branch
git status
4. Creating and Submitting Modification
Create an empty file whose name is your GitCode ID in the working directory of the repository and add it to the Git staging area. Then, submit the modification and push it to the remote repository.
# a) Access the working directory.
#Make the modification in this directory and do not modify other files in the directory.
cd ./pr/primary/
# b) Create an empty file named with your GitCode ID.
cd . > m0_52023560
# c) Add this file to the Git staging area (using your GitCode ID).
git add m0_52023560
# d) Make a commit (amendable).
git commit -s -m "Add m0_52023560"
# e) Push it to your remote repository.
git push --set-upstream origin m0_52023560
# f) Check the status.
git status
git log
Notes:
(1) "cd ." indicates changing the current directory to the current directory. That is, no change is made, and therefore, no output is available for this operation. Redirecting the output to a file creates an empty file.
(2) In this process, you need to enter your GitCode account and password.
(3) Multiple modification rules are available for the commit modification in step d) and can simplify the project submission history. The following describes the application of the edit rule:
 #Modify a specific submission in the history and set **N** to the required number of submissions.
 git rebase -i HEAD~N
 #In the opened editor, change "pick" before the submission record you want to modify to "edit", save it, and close the editor to locate Git to the specified submission for you to make modification.
 #To continue rebase after a modification, run the following command:
 git rebase --continue
 #Repeat the operations till the modifications are complete.
 #After the modification, run the following command to end rebase:
 git rebase --abort
(4) To push another commit modification to the remote repository, run the git push command in step e).
5. Submitting PR
After the modification is pushed to the remote repository, a Pull Request (PR) can be created. This requests the project maintainer to merge the modification into the main branch. The title and comments should be filed and the modification should be described in detail. The procedure is as follows:
Switch the branch:
After the modification is pushed to the remote repository, the new branch appears in the remote code of the repository.
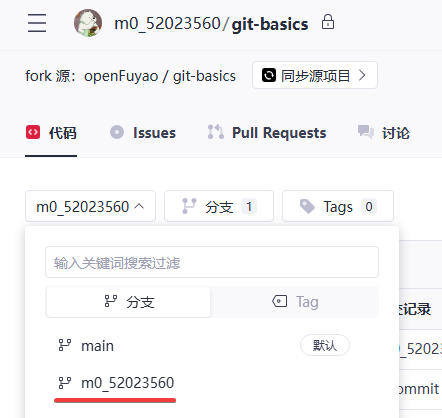
Click the branch to switch to it (m0_52023560 in this example).
Create a PR:
Choose Pull Requests > New Pull Request.

Select the created branch and submit the PR.
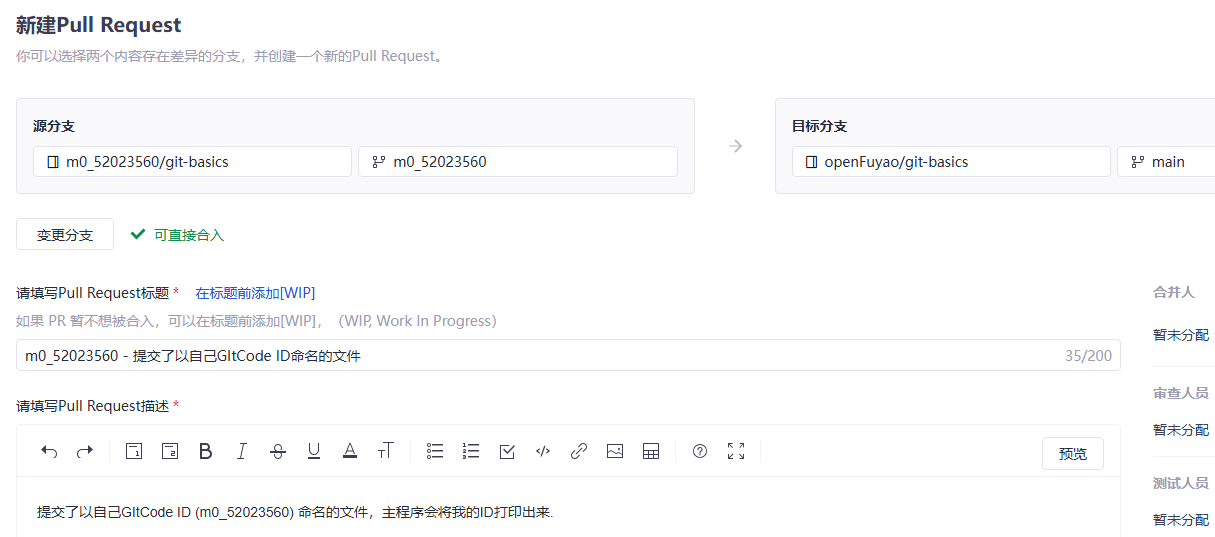
(1) Select the submitted branch of the repository. (In this example, the m0_52023560 branch of the remote repository is merged to the master branch of the upstream repository.)
(2) Fill in the title and comments (describe the modification in the submission).
(3) Click Create in the lower-right corner.
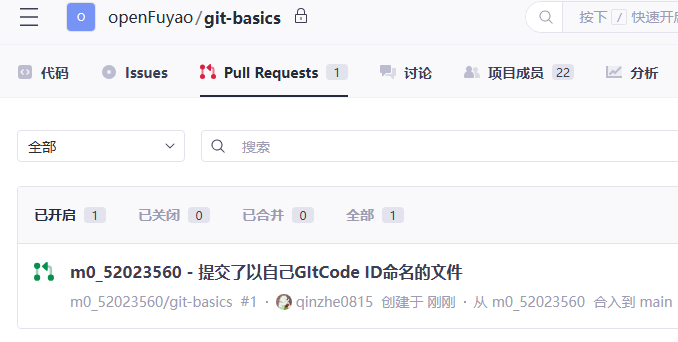
(4) After the submission succeeds, the original repository displays the submission.
6. Waiting for the Review Result
As a contributor to the community, you have completed the submission.
- Automatic test: If you submit code, the system automatically performs the test.
- Waiting for review: If the code is compliant, the community committer will perform the /lgtm action.
- Final confirmation: If everything goes well, the community maintainer will perform the /approve action.
- Recognition: After the preceding operations are complete, your code or document will be merged into the upstream repository, indicating that your contribution has been recognized.
Other Experience
1. Watch
When you watch a project, you will receive notifications about the project updates, including the issues, merge requests, and new releases of the project. This is helpful for those who want to be informed of the progress of a project in a timely manner.
2. Star
A star indicates that you are interested in or support a project. It can also be used as a mark when you browse others' repositories so that you can easily find the project that you are interested in later.

A bright star indicates operation success.
Conclusion
The experience of getting started with the openFuyao open-source community provides a lot of knowledge about open-source contributions. Every step from account registration to PR submission is a part of growth. I hope that my experience can help more beginners join this passionate and creative open-source world. Let's contribute to the open-source community together.
This article is first published by the openFuyao Community. Reproduction is permitted in accordance with the terms of the CC-BY-SA 4.0 License.